

Its Father's Day this Sunday and I thought it would be fun this morning to share with you some of the things I wish I could cook for my dad. Unfortunately he is all the way over in Canada, so it will have to be just a wish list. I suppose I could cook some of them for Todd, even though he's not my dad. He probably wouldn't complain too much! Here are my choices and I hope you will give some of them a go yourself as well! The "Dads" in your life are sure to appreciate them!
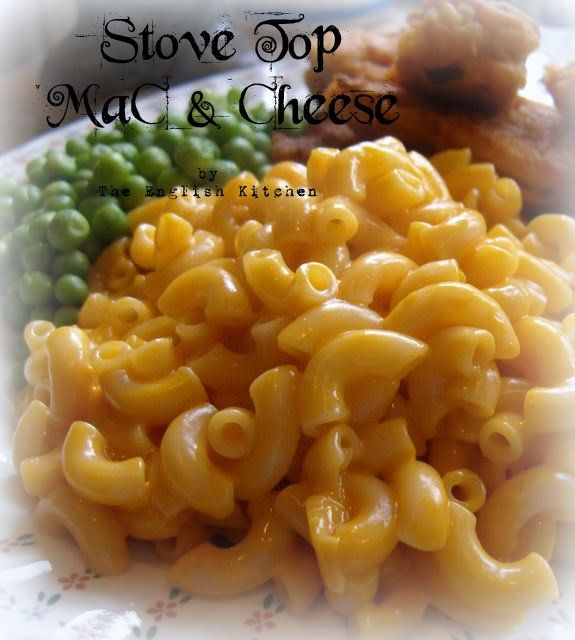
*Stove Top Macaroni and Cheese*
Serves 4
Printable Recipe
I got this recipe from my sister a long time ago, and yes, it too comes from my big blue binder. I'm not sure where she got it from, but I am sure it's delicious! Whenever I make it, I picture her in my mind . . . standing at her stove and stirring it up the very first time she showed me how to make it. I guess that's what makes the recipes in my blue binder all the more special . . . each one has a particular memory attached, a person, a feeling . . .
8 ounces of uncooked macaroni
4 tablespoons butter
2 eggs, beaten
6 ounces evaporated milk (not sweetened condensed)
If you want to make it lower in fat, use the low fat version
1/2 teaspoon Tabasco sauce
1 teaspoon sea salt, rubbed between your fingers
freshly ground black pepper
3/4 teaspoon mustard powder
10 ounces cheddar cheese, shredded (I use a combination of mature cheddar and leicester cheese)
Bring a large pot of salted water to the boil. Cook your macaroni in this until just al dente, according to the package directions. Drain well, then return to the pot. Add the butter and toss the macaroni well in it to coat. In a large beaker, whisk together the eggs, milk, hot sauce, salt, pepper, and mustard. Stir into the hot pasta, and add the cheese. Turn the heat to low, and continue to stir and cook until cheese is melted and mixture is creamy. Serve.
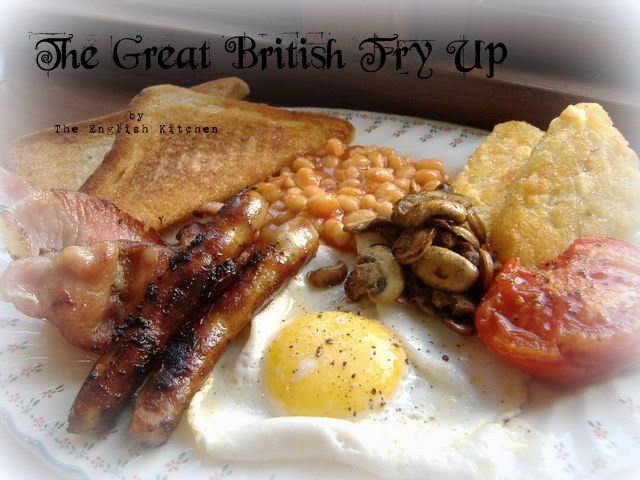
*The Great British Fry Up*
(the angst free way)
Serves 1
Printable Recipe
Feel free to multiply the quantities and directions according to however many people you are wanting to serve. Pop your plates into a warm oven while you cook everything up and be prepared to serve immediately with big mugs of milky tea, coffee or hot chocolate. Pick your own poison!
Per person allow:
2 sausages (buy the best you can buy. Cheap sausages are just plain nasty and full of fillers and fat. This is one instance you DO get what you pay for. I prefer Cumberland chipolatas myself)
2 to 3 rashers of back bacon
a hand full of mushrooms, sliced
1 to 2 ripe tomatoes
1 large free range organic egg (another instance of getting what you pay for. If you are going to be eating an egg like this, it better be a good one that tastes the way a proper egg should taste)
1 slice of bread
1 small tin of baked beans
Olive Oil and a bit of butter
Cooked hash brown potatoes or potato waffles
Heat a large heavy skillet over low heat and brush it very sparingly with a light coating of olive oil. Open the tin of beans and pour into a small saucepan. Put over low heat and heat while you are cooking your breakfast, giving them a stir once in a while to help keep them from sticking.
For the sausages:
Using a sausage with a high meat content, add the sausages to the pan and allow to cook slowly, for about 15 to 20 minutes, turning occasionally, until golden. Remove and keep warm on a plate in the oven while you cook the rest of the breakfast.
For the Bacon:
I always buy dry cure bacon for the best flavour. It has less water in it and cooks up really nicely. You can choose smoked or non-smoked as you wish. You may also use streaky bacon, back bacon is my personal preference. Snip a few small cuts into the fatty edge of the bacon. Place straight into the pan and fry for 2 to 4 minutes on each side, or until your preferred crispness is reached. Remove to the warm plate in the oven and old there while you continue cooking your breakfast.
For the Mushrooms:
Increase the heat to medium high and add a small knob of butter to the hot pan. Once it begins to foam, tip in the sliced mushrooms. Let them cook, without disturbing them, for several minutes before giving them a stir. Avoid moving them around too much while cooking as this makes them rather soggy. Once they are as browned as you like, remove them to the hot plate in the oven as well.
For the Tomatoes:
Cut the tomatoes across the centre if using regular tomatoes, or in half length ways if using plum tomatoes. Cut the "eye" out of the top with a small paring knife. Season with salt and pepper and place cut side down into the pan drippings, adding a bit more butter if need be. Cook , undisturbed for about 2 minutes over medium heat. Gently turn over and continue to cook for another 2 to 3 minutes until tender but still holding their shape. Remove and place in the oven with everything else.
For the Fried Bread:
For the best fried bread it is highly recommended to cook it in a separate pan. Stale bread works best. Just plain old store bought white bread. Heat a skillet to medium heat and cover the base of the pan with oil. Once it is hot, add the bread and cook for 2 to 3 minutes on each side until it is crispy and golden brown. If the pan starts to become dry you can add a bit more oil. I always like to add a small knob of butter to the pan just after I turn the slice to add a richer flavour. Delicious! Again, keep this warm in the oven with the rest of the breakfast while you fry your egg.
How to fry a perfect Egg:
I always start off with a clean pan for the egg. Heat the pan over medium heat. Add a good knob of butter and allow it to heat until it is foaming. Crack a fresh egg into a bowl and then slip it into the foaming butter. Don't be in a rush to cook it. Cook it over medium heat, basting it with some of the hot butter from time to time, until it is cooked to your preferred stage of doneness. If you prefer it over easy, flip it carefully once the whites are completely set and then remove it from the pan immediately. I prefer it sunny side up with crispy brown edges.
If you must do Black Pudding:
Cut the black pudding into 3 to 4 slices. Remove the skin. Place in the heated skillet and cook for 1 1/2 to 2 minutes on each side until slightly crisped.
Hash brown potatoes:
We like hash brown potatoes with ours. You can make your own from scratch of course, but you can buy some really good frozen ones nowadays as well as potato waffles, which some people like also. I cook these before I even start the breakfast and just keep them warm in the oven while I cook the rest of the breakfast.Once all the elements of your breakfast are cooked,place it all on warmed plates and serve along with lashings of tomato ketchup or brown sauce!
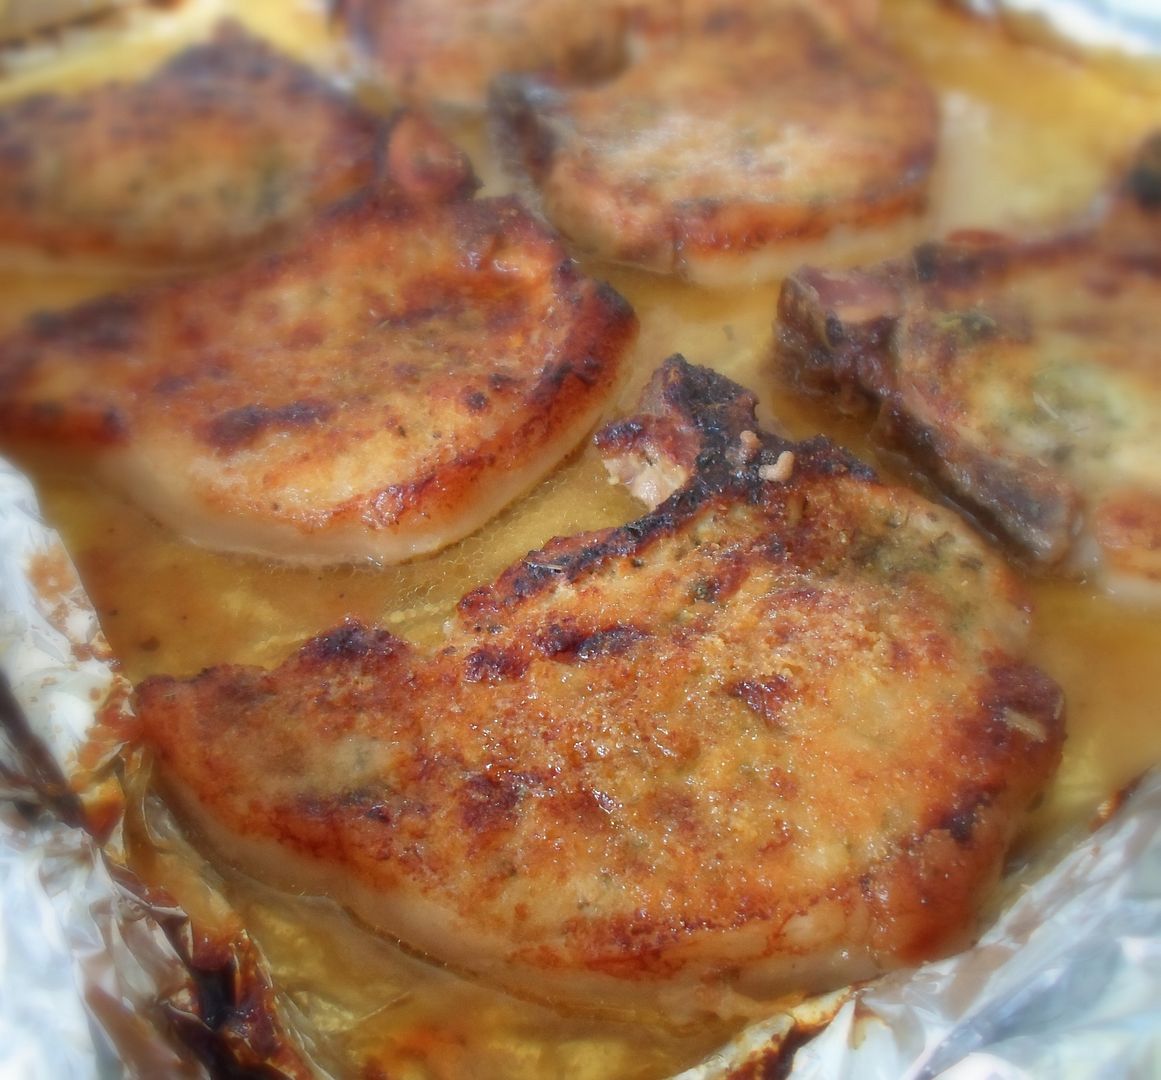
*Oven Baked Breaded Pork Chops*
These directions are for one chop, but can be multiplied
to as many as you want to serve.
Printable Recipe
This is more of a method than a recipe. It is the way I have been doing my breaded pork chops for years and years. They always end up tender and moist. The crumbs on the bottom don't alway stick, but they do meld into the juices to make a lucious sauce and the crumbs on the top always stay put. All in all they are truly delicious.
1 bone in pork chop per person
salt, pepper, dried sage and garlic powder
2 TBS of fine dry bread crumbs per chop
butter to dot
apple juice
Preheat the oven to 200*C/400*F. Line a large shallow baking tray with foil and lightly grease the foil. Onto the baking sheet place as many chops are you are wanting to serve. Obviously if you are only cooking one or two you will want a smaller baking tray. Dust the top surface of each chop with some salt, pepper, sage (rubbed between your fingertips) and garlic powder to taste. Then sprinkle a tablespoon of bread crumbs evenly over top of each one. Dot with butter. Pour apple juice into the baking tray evenly around the chops, trying not to disturb the crumbs on top. Place the tray into the oven and bake for 15 to 20 minutes, checking to make sure the apple juice does not boil dry in the pan. Once the crumbs have begun to brown on top, remove the pan from the oven. Carefully turn each chop over without disturbing the crumb topping and repeat the process for seasoning and crumbing on the underside. If you need more juice in the pan, once again pour it around the chops. Return the pan to the oven and cook for another 15 to 20 minutes, until nicely browned on top and the juices have thickened into a bit of a sauce. Check every 10 minutes or so to make sure the pan is not going dry and top up with more juice if need be. Serve hot with some of the pan juices spooned over top. Fabulous!
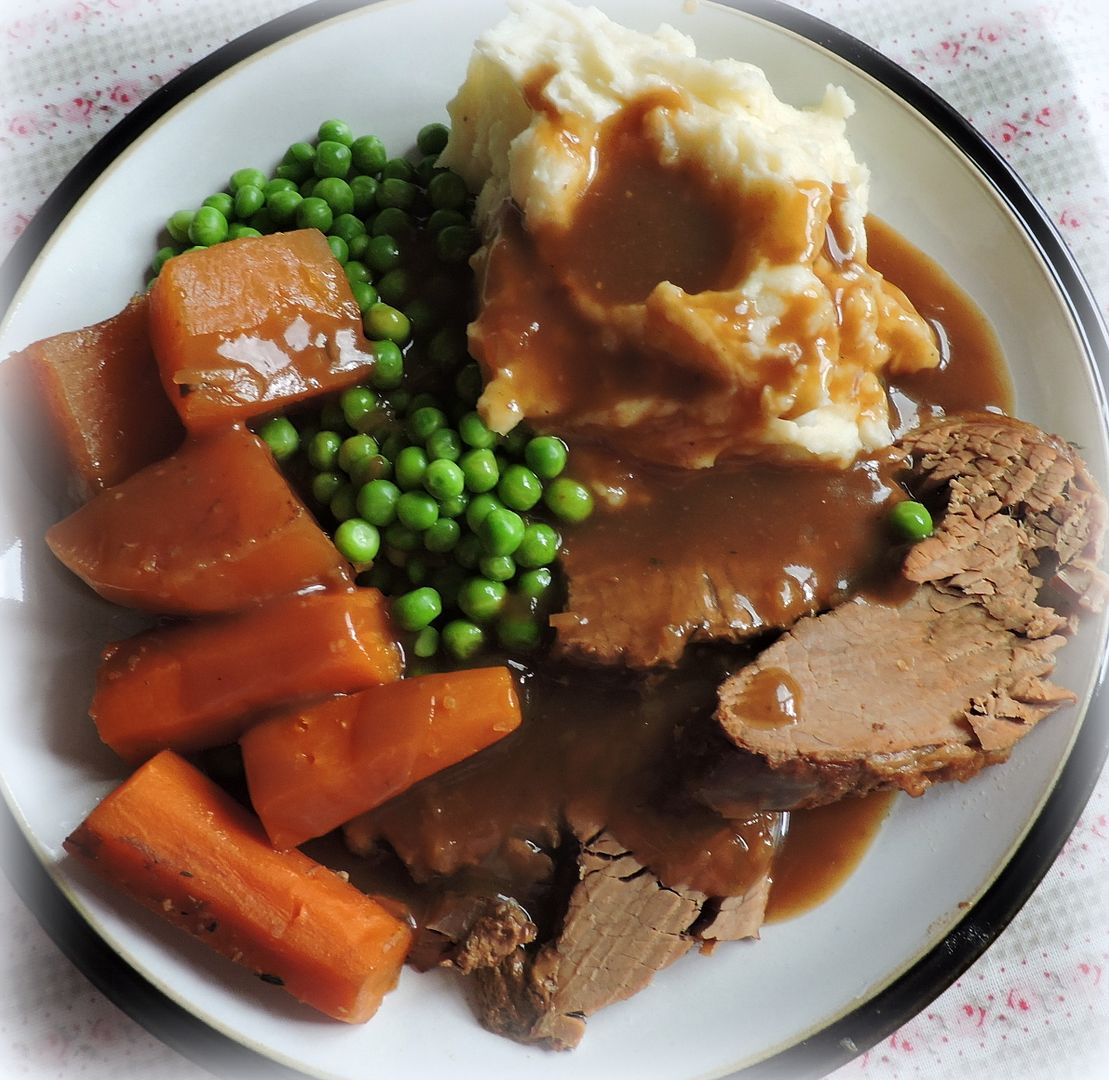
*Onion Pot Roast*
Makes 4 to 6 servings
1 large bay leaf broken
1/2 tsp dried thyme
salt and black pepper to taste
Preheat
the oven to 165.C/325*F/ gas mark 3. Have ready a lidded
roaster/casserole dish large enough to hold the meat and vegetables.
Place
the prepared vegetables in the bottom of the casserole or roaster.
Season the meat all over with salt and pepper and lay on top of the
vegetables. Sprinkle with the dry onion soup mix and thyme. Whisk
together the beef broth, apple juice, vinegar and brown sugar. Pour
over top of the meat and vegetables. Tuck in the bay leaf. Cover
tightly.
Roast for about 3 1/2 hours without
disturbing. Remove the lid and roast for a further half an hour, until
the meat is very tender and lightly browned. Remove from the oven.
Remove the meat to a plate, cover lightly with foil and set aside to
rest. Scoop out the vegetables to a bowl and keep warm. Remove and
discard the bay leaf.
If the roaster/casserole is
flame proof, place on top of a stove burner and turn on to medium heat.
If not, pour the juices into a sauce pan and proceed. Whisk in the
flour which has been shaken with the cold water. Cook over medium heat,
whisking constantly until the gravy boils and thickens. Reduce to low
and cook for at least five minutes.
Serve the meat sliced with some of the gravy spooned over top.
Note-
This will make lots of delicious gravy. Any that doesn't get used can
be frozen in containers ready to use at a later date in pot pies, etc.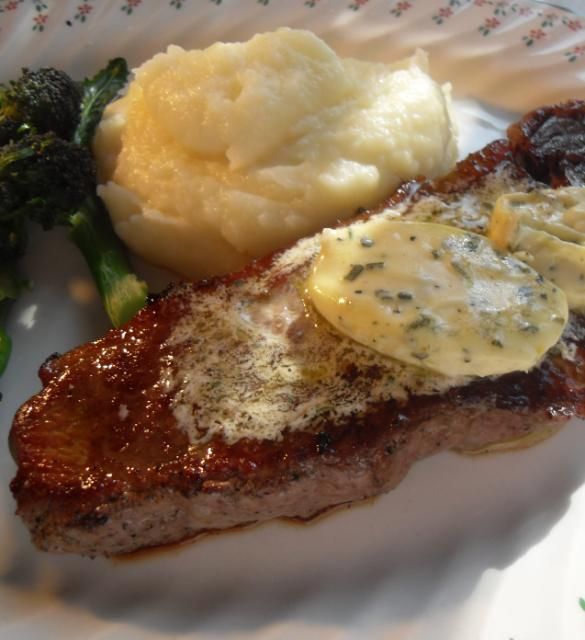
*Pan Grilled Steaks with Bearnaise Butter*
Serves 4
Printable Recipe
Perfectly cooked and tender rib steaks with a delicious bearnaise butter melted on top. Fabulous! Make the butter at least one hour before serving, or up to a day ahead.
4 1-inch thick rib eye steaks, at room temperature
Vegetable oil
sea salt and freshly ground black pepper
For the butter:
3 TBS softened butter
2 tsp finely chopped tarragon leaves
2 tsp minced shallots
1/2 tsp fresh lemon juice
pinch of salt
First make the butter. Mash together the butter, tarragon, shallots, lemon juice and salt. Mix well. Shape into a small log on a piece of cling film. (Approximately 4 inches long) Wrap well and then place in the refrigerator to chill.
When you are ready to eat, heat a large heavy skillet over medium high heat. Brush each of the steaks on both sides with a bit of vegetable oil. Sprinkle each side with a bit of salt and pepper. Sear in the hot skillet, cooking the first side for approximately 4 minutes for medium rare. Turn over and sear the other side for approximately the same amount of time. Remove from the heat and place on heated plates.
Serve with slices of the bearnaise butter on top. Delicious!
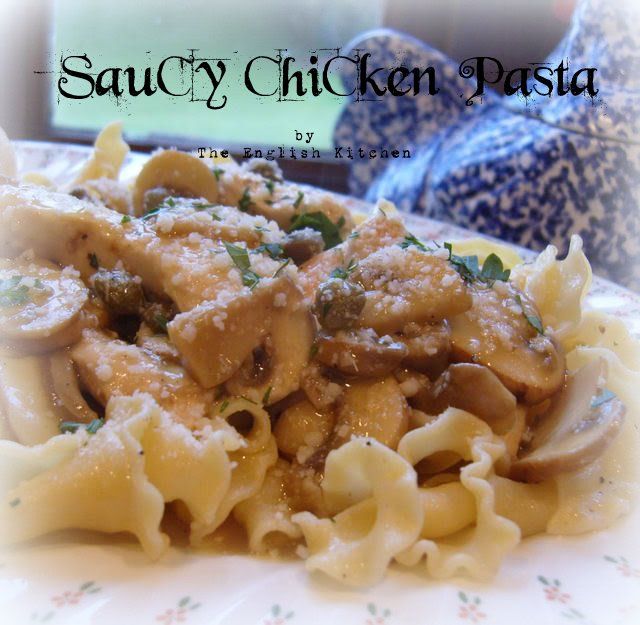
*Saucy Chicken Pasta*
Serves 4
Printable Recipe
This delicious chicken dish uses all the elements of Chicken Piccata except there is none of the fuss or bother, just the lovely flavours. The recipe calls for fettuccine noodles, but I always use malfalda. Todd just doesn't care for long slippery noodles at all and copes with shorter fatter ones much better. Whichever pasta you choose to use, make sure you choose one that will capture all of the delicious sauce! Oh, and don't forget some tasty bread to mop up the extras!
4 boneless, skinless chicken breasts, cut into strips
1 TBS olive oil
2 cups fresh mushrooms, sliced
2 garlic cloves, peeled and minced (more or less to taste)
1 TBS butter
2 cups chicken broth
1/3 cup white wine
the zest of 1 lemon
the juice of 1/2 lemon
2 TBS capers, rinsed and drained
1 TBS cornflour, dissolved in 2 TBS water
sea salt and freshly ground black pepper to taste
2 TBS chopped fresh flat leaf parsley
freshly grated Parmesan cheese
1 pound pasta, cooked al dente and then drained
Heat the olive oil in a large skillet over medium high heat. Once it begins to shimmer, add the chicken pieces and brown them all over until golden brown. Remove with a slotted spoon and keep warm.
Add the butter to the skillet and then brown the mushrooms until golden. Add the garlic, reduce the heat somewhat and then cook for several minutes until golden and fragrant, without allowing it to brown.
Put your water to cook your pasta on and bring it to a boil, adding a tsp of salt to the water. Add the pasta and cook it while you are finishing up your sauce.
Add the wine to the skillet, and let it bubble up. Allow it to reduce for a few minutes and then add the chicken broth, lemon zest, lemon juice and capers. Bring to a quick simmer and allow to cook for about 5 minutes until it has reduced somewhat. Taste for seasoning and add salt and pepper as required. Stir the cornstarch water mixture and then stir it into the sauce, stirring until it thickens and coats the spoon. Add the chicken and simmer for five minutes or so until your pasta is finished cooking.
Drain your pasta well and rinse, then divide it onto heated plates. Spoon the chicken sauce evenly over each plate. Sprinkle each serving with some freshly grated Parmesan cheese and some of the chopped parsley. Serve.
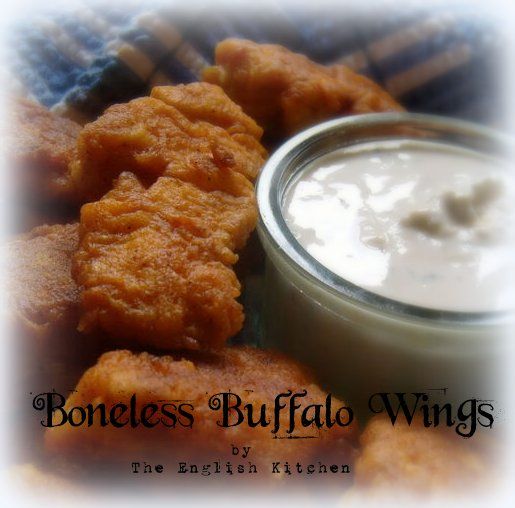
*Boneless Buffalo Wings*
Serves 2
Printable Recipe
This is a delicious way to have your cake and eat it too . . . ahh . . . err . . . wings, I mean. Tender, juicy and chock full of flavour, these please on all counts! If you are not a fan of really spicy food you can cut down the amount of cayenne pepper and they will still be very good.
1 cup plain flour
1 tsp salt
1/2 tsp ground black pepper
1/4 tsp ground cayenne pepper
1/4 tsp paprika
1 large egg, beaten
1 cup milk
2 boneless, skinless chicken breast fillets
vegetable oil (for frying)
1/4 cup hot sauce (I use Louisiana which my friend Eliza brought over to me)
1 TBS butter, melted
Blue Cheese Salad dressing for dipping, if desired (see recipe below)
Whisk together the flour, salt, peppers and paprika in a bowl. Set aside. In another bowl beat together the egg and milk.
Slice each chicken breast crosswise into about six pieces. One at a time, dip each piece into the egg mixture, and then into the flour mixture, turning it to coat. Repeat once more with each piece of chicken so that they are double coated. (I use one hand for the flour mix and one for the egg mix, that way my fingers don't get as messy) Place each piece on a plate while you finish coating them all. Place in the refrigerator to chill for about 15 minutes.
Heat about a 1/4 inch of oil in a skillet over medium high heat. Once it is hot add the chicken pieces a few at a time and cook them for about 3 minutes on each side, until nicely browned. Remove to a dish lined with paper toweling and keep warm while you are cooking them all.
Melt the butter and stir it together with the hot sauce. Once you have finished cooking all the chicken pieces, brush them with this mixture and then serve with some blue cheese dressing to dip them in if desired. Delicious!
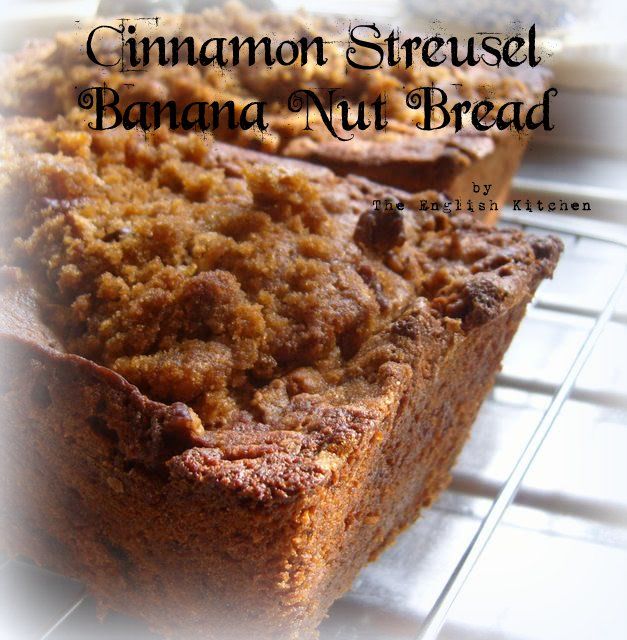
*Cinnamon Streusal Banana Nut Bread*
Makes two loaves
Printable Recipe
This may well be the best banana bread you will ever eat. Moist, flavourful with a deliciously crunchy topping of brown sugar, nuts and cinnamon, this pleases everyone.
3/4 cup butter, softened
8 ounces mascarpone cheese
2 cups caster sugar
2 large eggs
1 tsp pure vanilla extract
3 cups plain flour
1/2 tsp baking powder
1/2 tsp baking soda
1/2 tsp salt
4 medium bananas, peeled and mashed
1 cup toasted pecan nuts, chopped
STREUSAL:
1/2 cup firmly packed soft light brown sugar
1/2 cup toasted pecan nuts, chopped
1 TBS plain flour
1 TBS melted butter
1/2 tsp ground cinnamon
Pre-heat the oven to 180*C/350*F. Lightly grease and flour two 8 by 4 inch loaf pans and set aside.
Cream the butter and mascarpone cheese together in a large bowl, until creamy. Gradually beat in the sugar, beating until light and fluffy. Beat in the eggs, one at a time. Stir in the vanilla extract.
Whisk the flour, baking powder, baking soda and salt together in another bowl and then gradually stir this mixture into the banana mixture, beating at low speed until just blended. Stir in the bananas and pecans. The batter will be thick. Divide it amongst the two prepared loaf pans, smoothing the tops.
Make the streusal by stiring together all the streusal ingredients until crumbly. Sprinkle this mixture evenly over each banana loaf.
Bake in the pre-heated oven for about an hour, to an hour and fifteen minutes, or until a wooden toothpick inserted in the centre comes out clean. You may need to cover the top with aluminum foil the last 15 minutes or so to help prevent it from over browning.
Cool in the pans on wire racks for at least 10 minutes before removing from the pans to finish cooling. Slice with a serrated knife to serve.
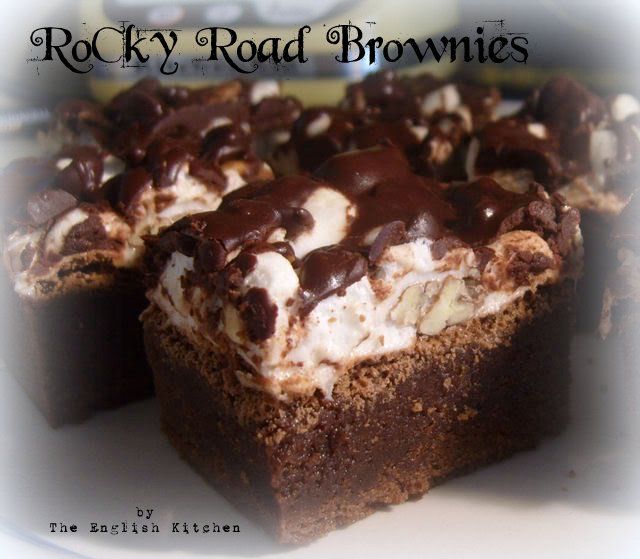
*Rocky Road Brownies*
Makes 16 (depending on how big you cut them and how greedy you are!)
Printable Recipe
These lovely bars are every body's favourite. Rich, fudgy, gooey and very moist, I've never had anyone turn one down! Another one from my Big Blue Binder . . .
3 ounces unsweetened chocolate, chopped
1/2 cup butter (4 ounces)
2 cups caster sugar
4 large eggs
2 tsp pure vanilla extract
1 cup plain flour
1/2 tsp salt
TOPPING:
3 TBS butter
8 ounces pure chocolate chips
1/4 cup pure chocolate chips
2 cups miniature marshmallows
1/2 cup coarsely chopped toasted pecans or walnuts
Pre-heat the oven to 180*C/350*F. Butter a 9 inch square baking pan, line it with parchment paper (to ease in removal and cutting), and butter the paper. Set aside.
Put the chopped chocolate and 1/2 cup of butter into a medium sized saucepan and set over a burner on very low heat. Cook, stirring constantly, until melted and thoroughly amalgamated. Remove from the heat and stir in the sugar. Beat in the eggs, one at a time, mixing in thoroughly each time. Blend in the vanilla. Whisk together the flour and salt and then blend it into the chocolate mixture, blending only until no white streaks remain. Pour the batter into the prepared pan.
Bake for 35 to 40 minutes, until dry on top but still moist. A toothpick inserted in the centre should come out with moist crumbs clinging to it's surface. Cool the brownies in the pan for about 10 minutes.
While the brownies are cooling melt the butter and the 8 ounces of chocolate chips for the topping together over low heat in a small saucepan. Whisk together until smooth and keep warm.
Mix together the remaining chocolate chips, marshmallows and chopped nuts. Sprinkle them evenly over top of the brownies. Return them to the oven and bake for an additional 3 to 5 minutes. Remove from the oven and drizzle the melted chocolate mixture evenly over top. Set aside to cool completely on top of a wire rack before removing from the pan and cutting into squares or rectangles. Enjoy!!
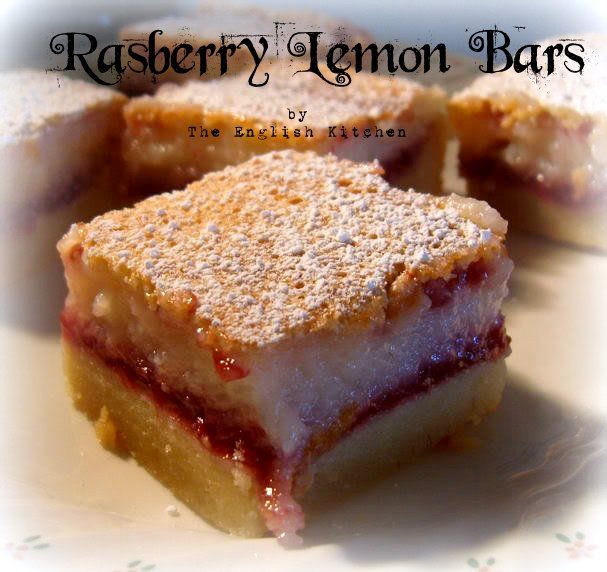
*Raspberry Lemon Bars*
Makes 15 squares
Printable Recipe
These delicious squares combine a buttery shortbread crust and a tangy lemon curd topping, all sandwiched together with sweet and fruity strawberry jam. A batch of these baked in mid-winter is a sweet and satisfying reminder of warm summer days.
2 cups plus 3 TBS plain flour
1/3 cup icing sugar, plus extra for dusting
¼ tsp salt
8 ounces chilled butter, cut into small pieces
1 ¼ cups caster sugar
½ tsp baking powder
3 large eggs
1/3 cup fresh lemon juice
2 tsp grated lemon zest (I use un-waxed lemons,
if you aren’t using these wash your lemons
well in warm soapy water)
¾ cup good quality strawberry preserves (you can also use raspberry)
Pre-heat the oven to 180*C/350*F. Grease and flour an 11 X 7 inch baking pan. I then line it with greaseproof paper lengthwise, leaving a one inch overhang either end so that I can lift the squares out after baking for ease in cutting into squares.
Stir together 2 cups of the flour, 1/3 cups of the icing sugar and salt. Rub in the cold butter until the mixture resembles coarse crumbs. Press into the prepared baking pan evenly and bake for about 16 minutes until just firm.
Stir together the sugar, 3 TBS flour, and baking powder in a bowl. Stir in the eggs, lemon zest and lemon juice, mixing well.
Remove the pan from the oven and spread with the strawberry jam evenly. Pour the lemon mixture over top and return the pan to the oven. Bake for another 25 to 30 minutes until set. Remove from the oven. Let cool in the pan before removing and cutting into squares. Lightly dust with more icing sugar before serving.

*Apple Pie Roll Ups*
Makes 12 roll ups
Printable Recipe
I may never make a normal apple pie again. These are quick fun to make and quite scrummy! I served them with custard of course!
3 1/2 ounces caster sugar (1/2 cup)
2 tsp ground cinnamon
1/4 tsp freshly ground nutmeg
1 320g package of ready rolled all butter shortcrust (in North America,
use a 14 ounce package of refrigerated pie crust)
3 TBS melted butter
2 medium tart apples, peeled and cut into 6 wedges each
Preheat the oven to 230*C/425*F/ gas mark 7. Line a large baking sheet with baking parchment. Set aside.
Whisk together the sugar, cinnamon and nutmeg in a small bowl. Set aside.
Unroll the pastry onto a lightly floured surface. Brush with 2 TBS of the melted butter. Sprinkle with all but 1 TBS of the cinnamon sugar. (reserve for a few minutes) Cut the sheet into 12 inch strips along the long side. Lay a wedge of apple on the short end of each pastry strip and roll them up, with the sugared side of the pastry against the apple. Place them onto the lined baking sheet. Brush with the remaining melted butter and sprinkle the remaining cinnamon sugar evenly over top.
Bake for 13 to 15 minutes until the pastry is golden brown. Serve warm, with or without custard. Delicious!
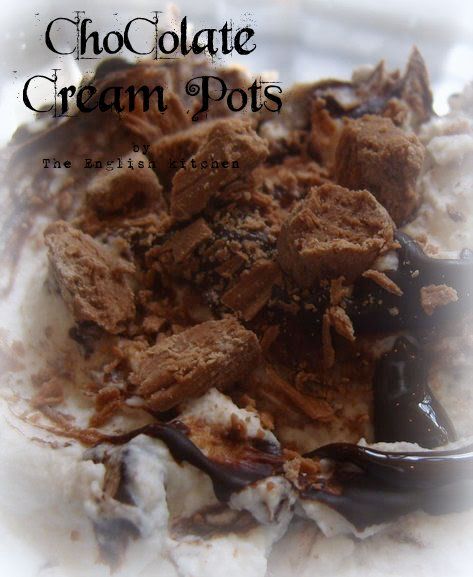
*Chocolate Cream Pots*
Serves 4
Printable Recipe
These decadent little pots of chocolate and cream are the perfect ending to a special meal. A tip is to use a potato peeler to make shavings from a chocolate bar to sprinkle on the top, or just use crushed chocolate flake bars like I have done here. Also, I don't do alcohol at home for home consumption, unless it is cooked. Instead of the Irish Cream asked for here I used a tsp of vanilla essence in both the cream and in the mascarpone cheese and it works just fine! You can use your imagination and try almond as well, which would be a great combination! Actually these little pots are incredibly versatile. Toasted Almonds are also quite lovely sprinkled on top! If you use almond essence you could also try crushed amaretti biscuits. Yummy!
5 ounces good quality dark chocolate
142 ml carton of whipping cream (about 1/2 cup)
5 TBS Irish Cream Liqueur
250g carton mascarpone cheese (8 ounces)
Chocolate shavings, chocolate flakes, toasted almonds to decorate (optional)
Break the chocolate into pieces and place in a bowl. Microwave on high for 2 minutes, stirring every 30 seconds or so until melted. alternately place the bowl over simmering water (without letting the water touch the bottom of the bowl) Stir until melted. Set aside to cool for a few minutes.
Whip the cream until it forms soft peaks. Don't be tempted to whip it until it is stiff. Soft is much better. Whisk in the liqueur. (Or 1 tsp vanilla) Beat the mascarpone cheese until smooth. Fold in the whipped cream. Pour in the melted chocolate and lightly swirl together. You want some ribbons of chocolate running through the mousse.
Spoon lightly into serving dishes and then sprinkle chocolate shavings, nuts or flakes generously on top to serve.
I admit, that last one was for me. ☺
Bon Appetit!


A whole post to PIN:)
ReplyDeleteI always love that pic:)
Awww thanks Monique! Me too! Happy Father's Day to J! xo
Delete